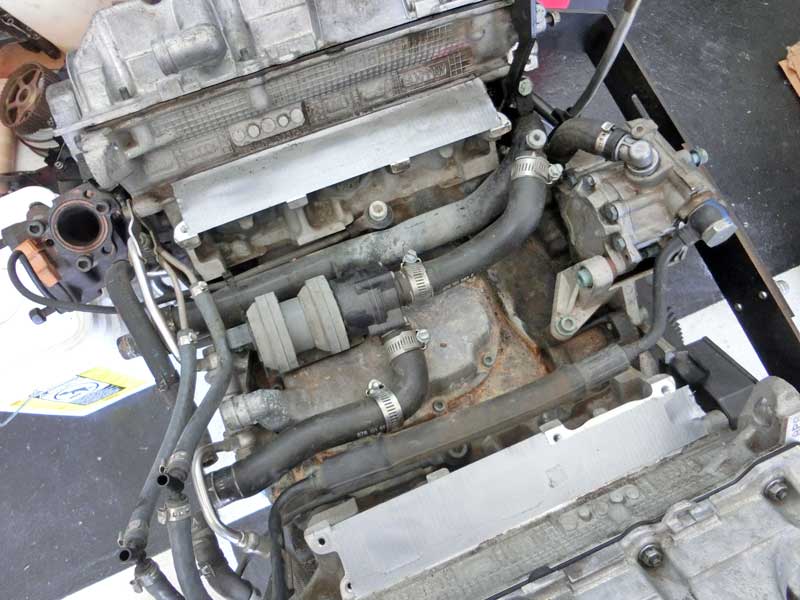
With the engine out of the car I’m taking the opportunity to install some new seals, gaskets, and o-rings with the rear main seal being the biggie today.
First up were the valve cover gaskets and cam chain tensioner gaskets.
After run pump
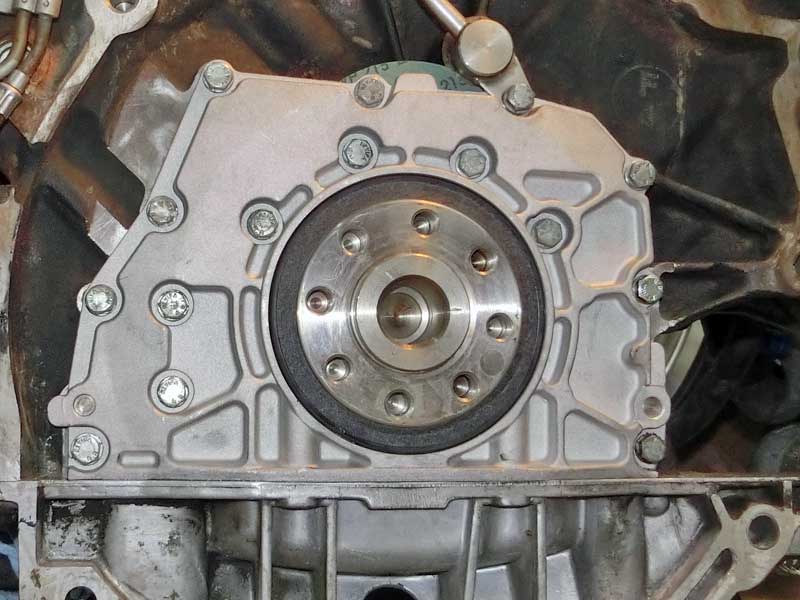
Then I moved to the back of the engine to replace the rear main seal.
Audi B5 S4 Rear Main Seal – RMS
After a couple of tries I had the seal on with a good fit, only to realize I didn’t know where I had placed the bolts to tighten it down. With stuff strewn throughout the garage it took a few minutes to find the misplaced bolts and get the job finished.
Note: The two bolts in the bottom of the RMS are not installed in the picture, but I did not forget about them.
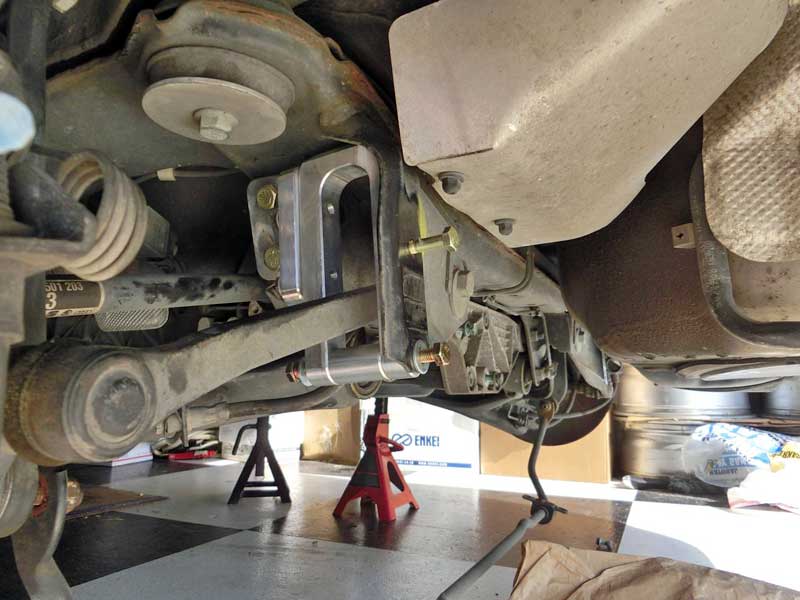
The Silver S4 that is in to be made healthy is now starting to see some upgrades added. I’m starting at the rear of the vehicle and plan to make my way forward. First off was the stock sway bar to be replaced by the 034 Motorsport swaybar and 034 adjustable endlinks. The first step of this upgrade is to install the subframe reinforcing brackets.
034 Motorsport Swaybar Subframe Brackets
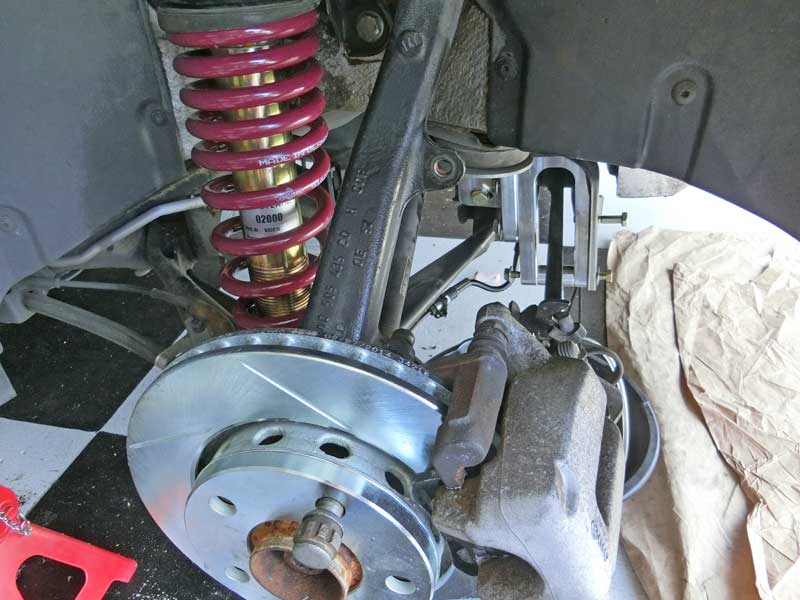
Next I moved over to the driver side brakes to replace the pads and rotor along with upgrading to the 034 Motorsport brake lines.
034 Motorsport Brake Lines
While I was underneath the car the rear differential fluid was changed out with some Liqui Moly fluid.
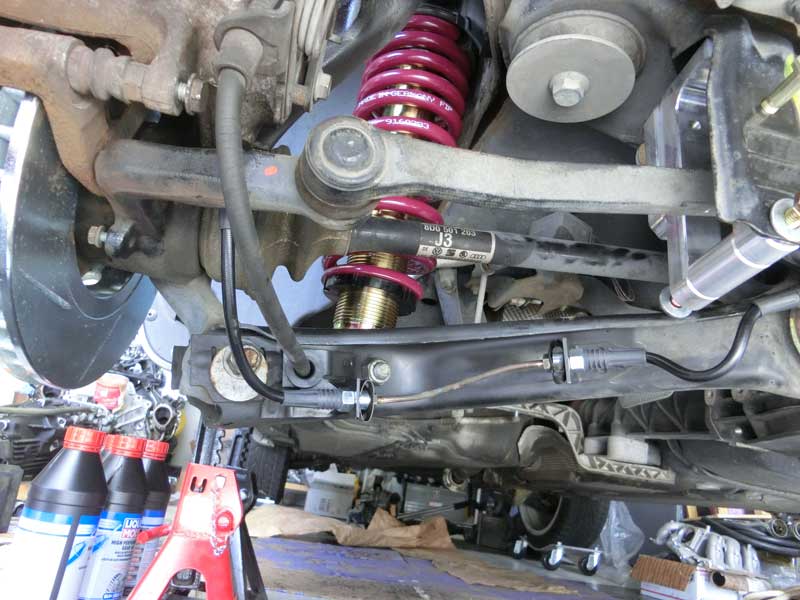
The stock suspension was removed and a Vogtland coilover was installed in its place.
Vogtland Coilover
(Note: The rotor was swapped with the other after the picture was taken so that the slot angle is the other direction.)
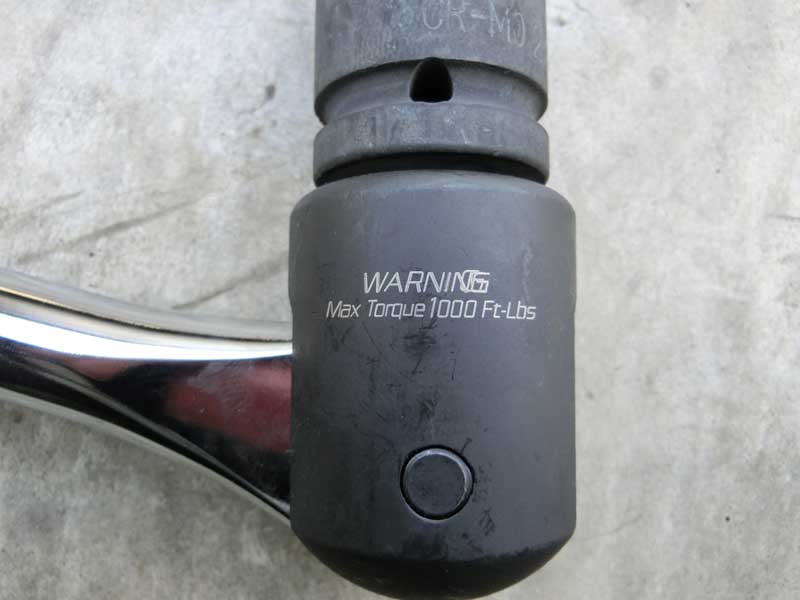
The wheel bearings are also going to be replaced, but the rear axle bolt has been putting up a good fight against my breaker bar.
Breaker Bar Torque Rating
The bolt is going to strip before loosening, so I’m holding off on trying any more so I can get the car to a shop equipped with an impact wrench.
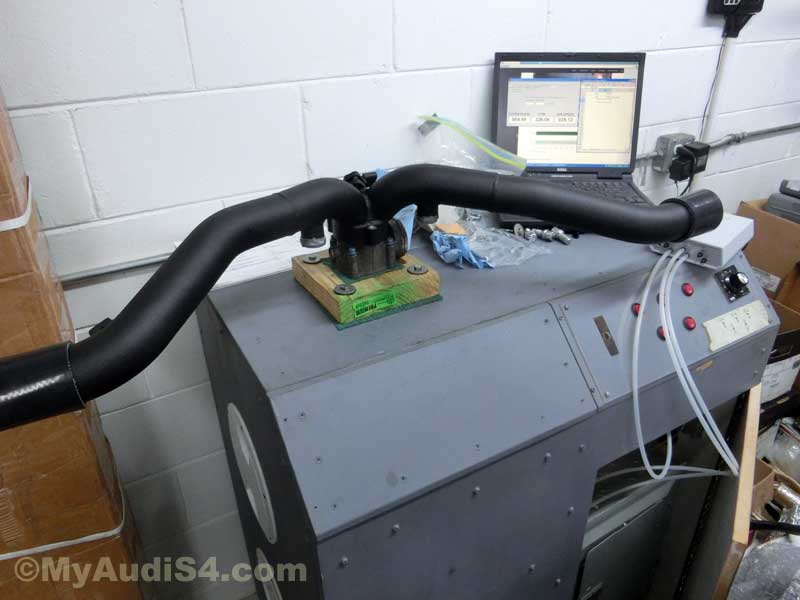
An XS-Power bipipe was delivered a few days ago to go into the Get Healthy Silver S4 that I’m currently working on. Since the product has not been flow tested, and this one is available, I decided to stick it onto the flowbench and see how it performs.
XS-Power Bipipe on Flowbench
The XS-Power bipipe intake diameter is 51 mm on the inside of the pipe. Here is how this compares to the other alternative bipipes I have measured the inlet size of:
APR: 49.8 mm
WDR-54: 52.4 mm
WDR-60: 59.3 mm
RS4: 61.1 mm
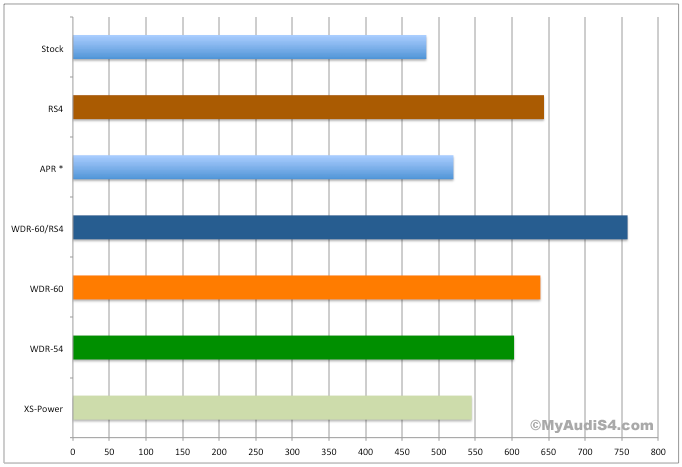
I tested the XS-Power Bipipe with a Stock B5 S4 Throttle Body at 28″ of H2O and recorded a CFM of 545. This compares to some of the other bipipe options as follows:
XS-Power Bipipe Flowbench Test Results
Peak airflow ranking correlates with the inlet diameter, the XS-Power bipipe places just above the APR bipipe and a little below the WDR-54 bipipe.
With the APR bipipe being discontinued the XS-Power bipipe presents a new option that is similar in design as well as performance.
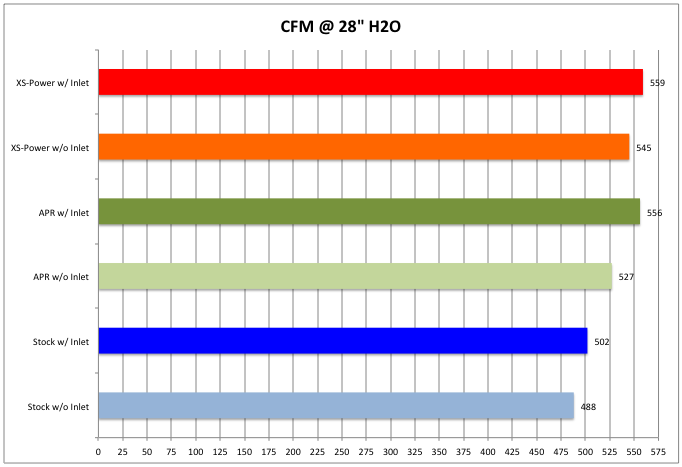
In the past I’ve noted that different results occur when the inlet hoses are connected to the bipipes. The comparison above is using just the bipipe without an inlet hose.
To illustrate how the inlet hose alters the airflow through the bipipe a comparison with and without the inlet coupler hose is shown below:
XS-Power vs APR vs Stock Bipipe Airflow
The APR bipipe shows the greatest increase in airflow with the coupler hoses attached, having a maximum airflow equivalent to the XS-Power bipipe within the measurement margin of error. All of the bipipes see a reasonable gain in airflow when the Intercooler coupler hose is attached to the end of the bipipe.